

I received a custom order for a mandocello with a guitar body.

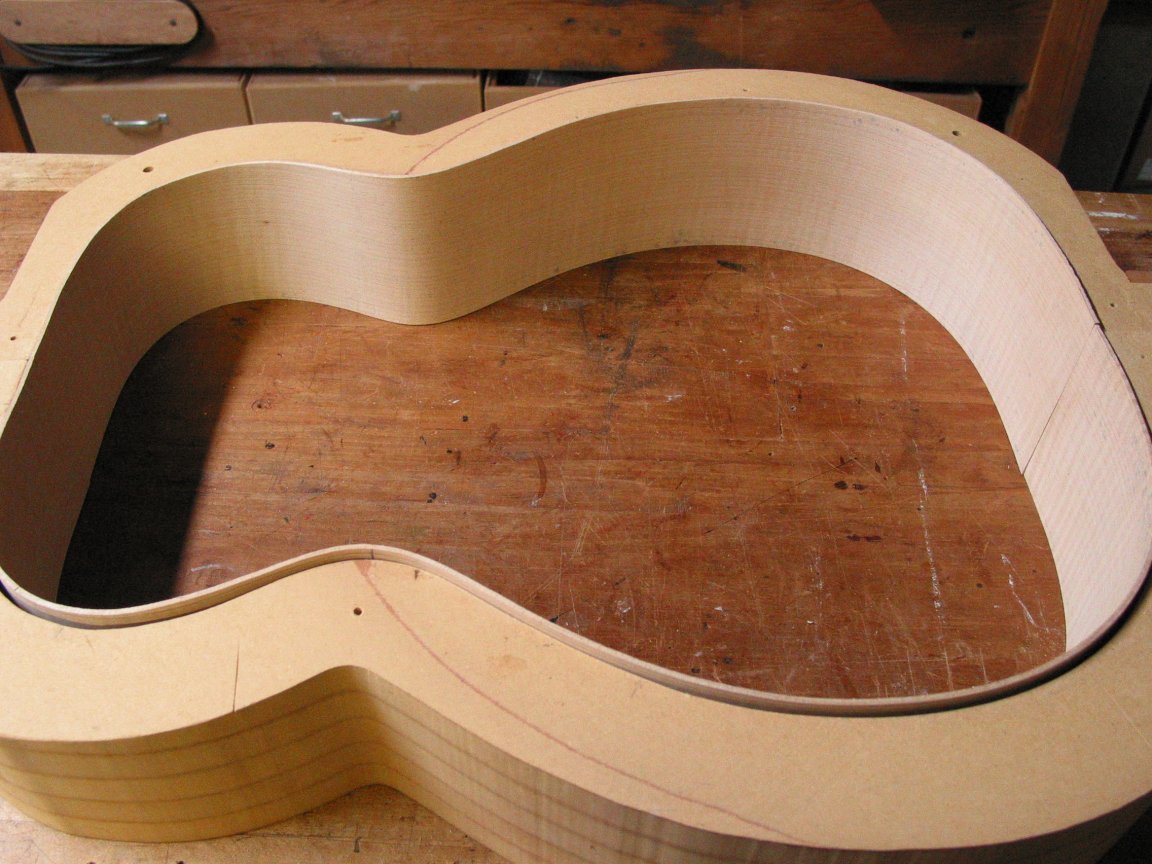
The sides have been bent and are placed in the mold to give the body its shape.
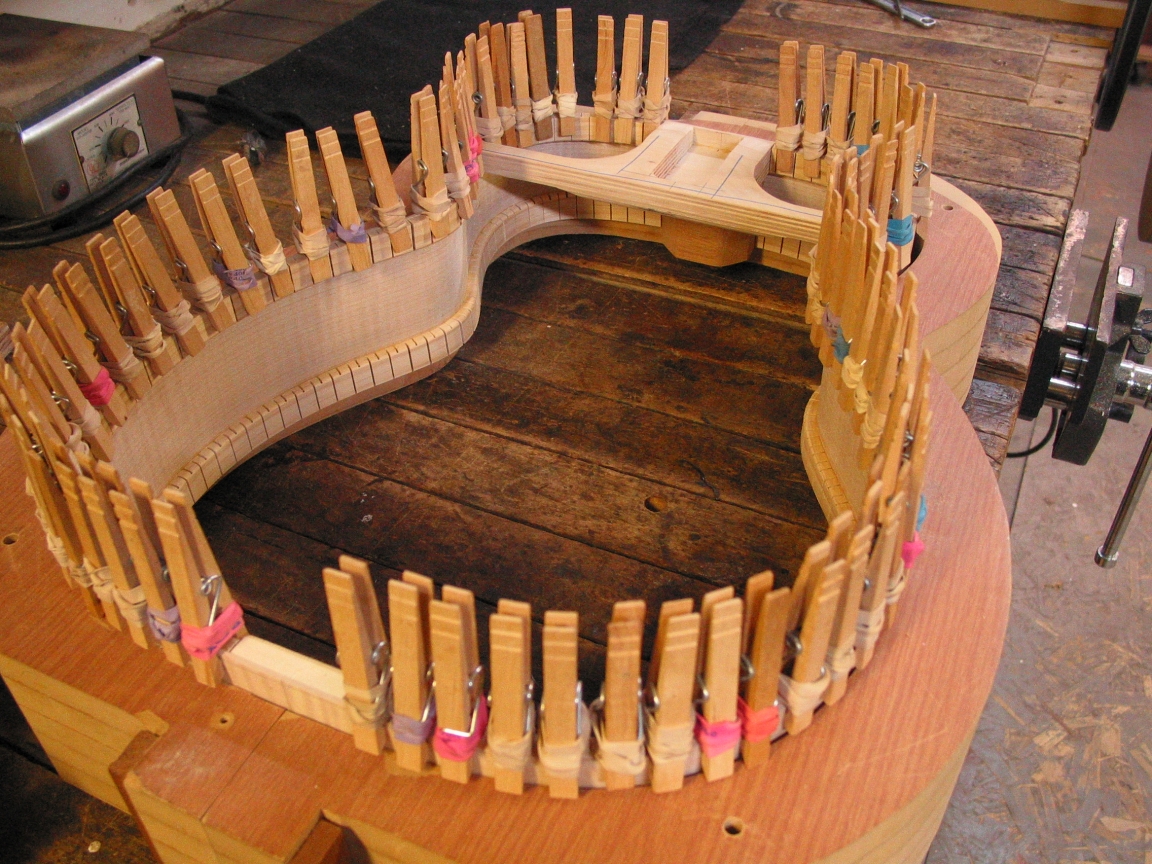
The linings are glued to the sides for reinforcement. Clothespins are used as clamps until the glue dries.
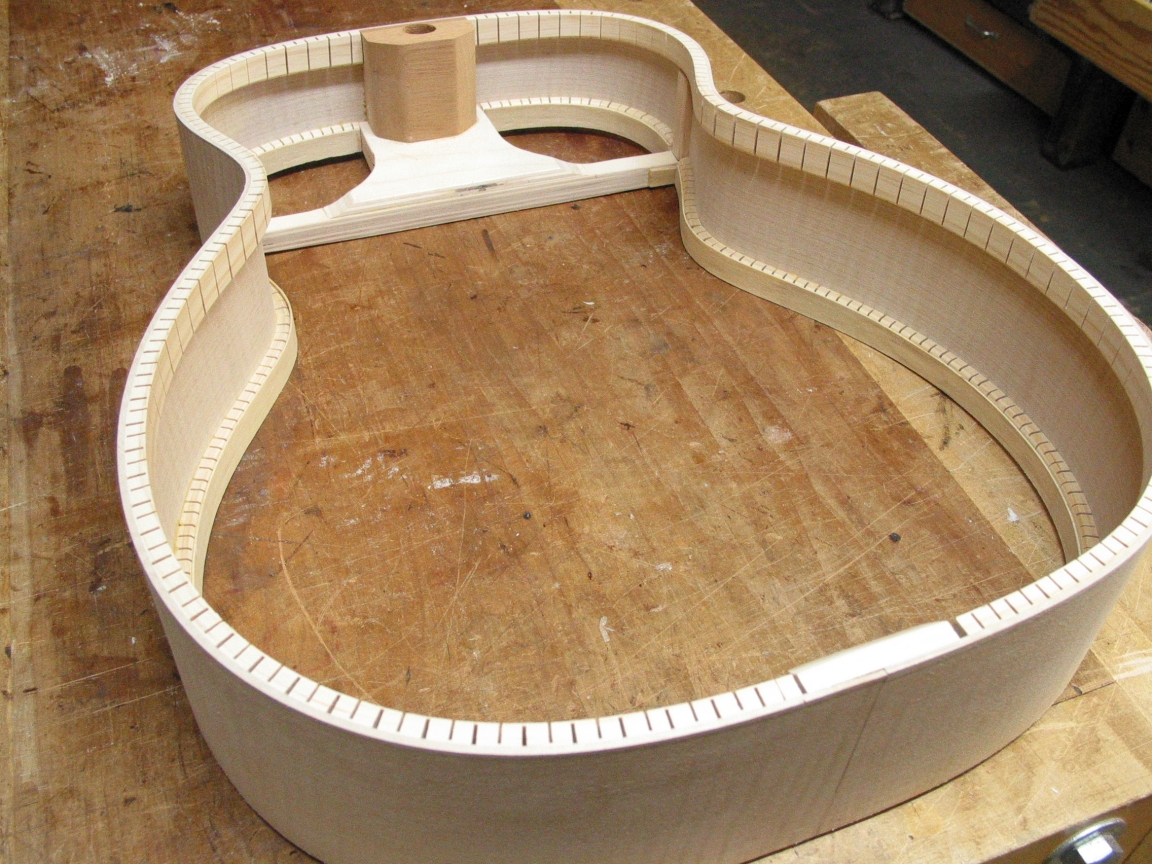
The completed rim. Very strong and rigid. The top, back and neck will attached to the rim.

After I make the rosette I inlay it into the top then scrape it flush.
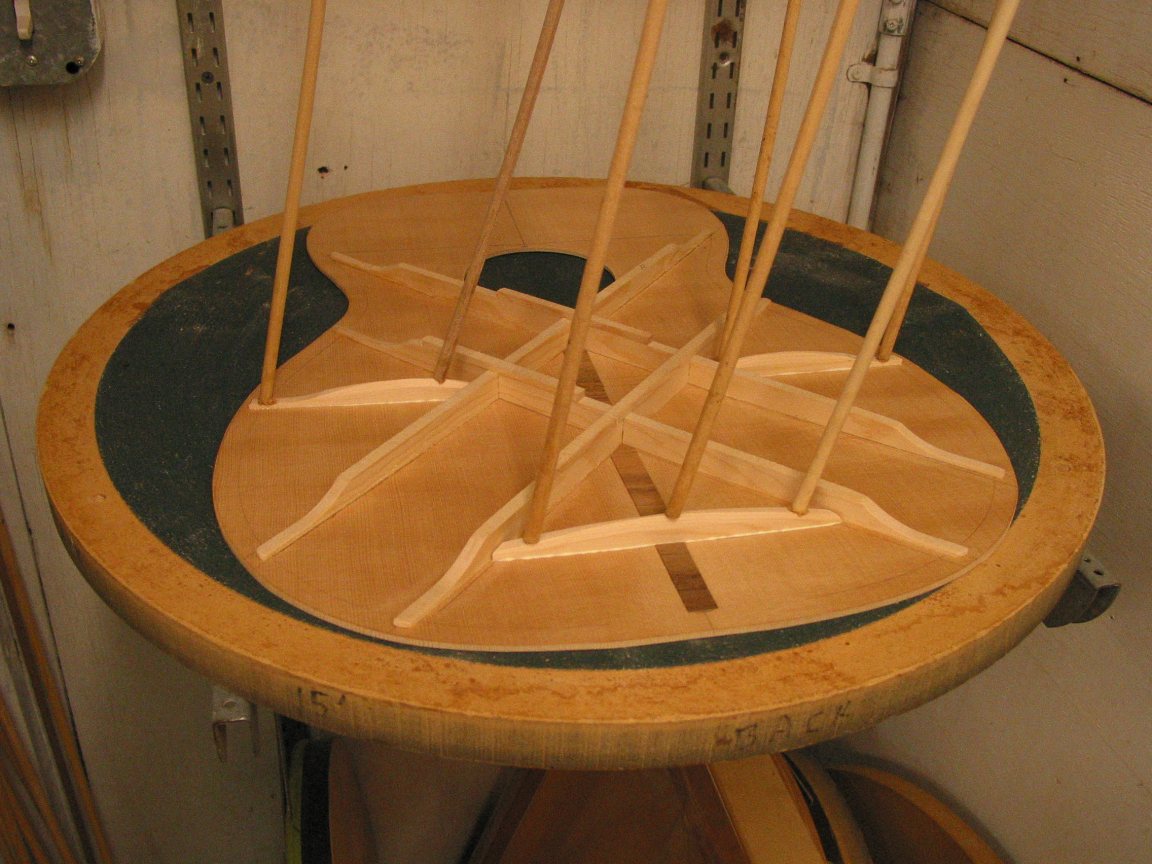
I make the braces out of Sitka spruce. I glue them on using a dished form so that the top has a slight arch which makes it much stronger.
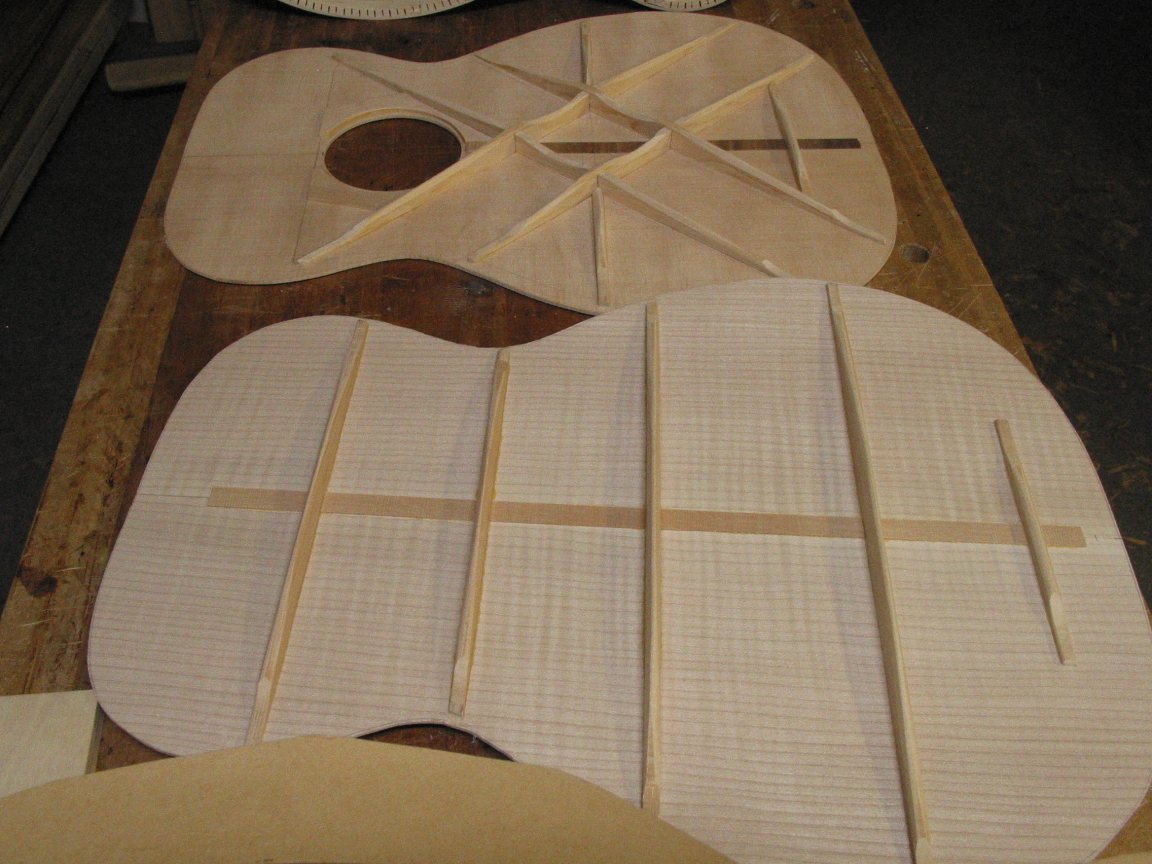
The top and back have been braced and are ready to glue to the rim to create the body of the mandocello.
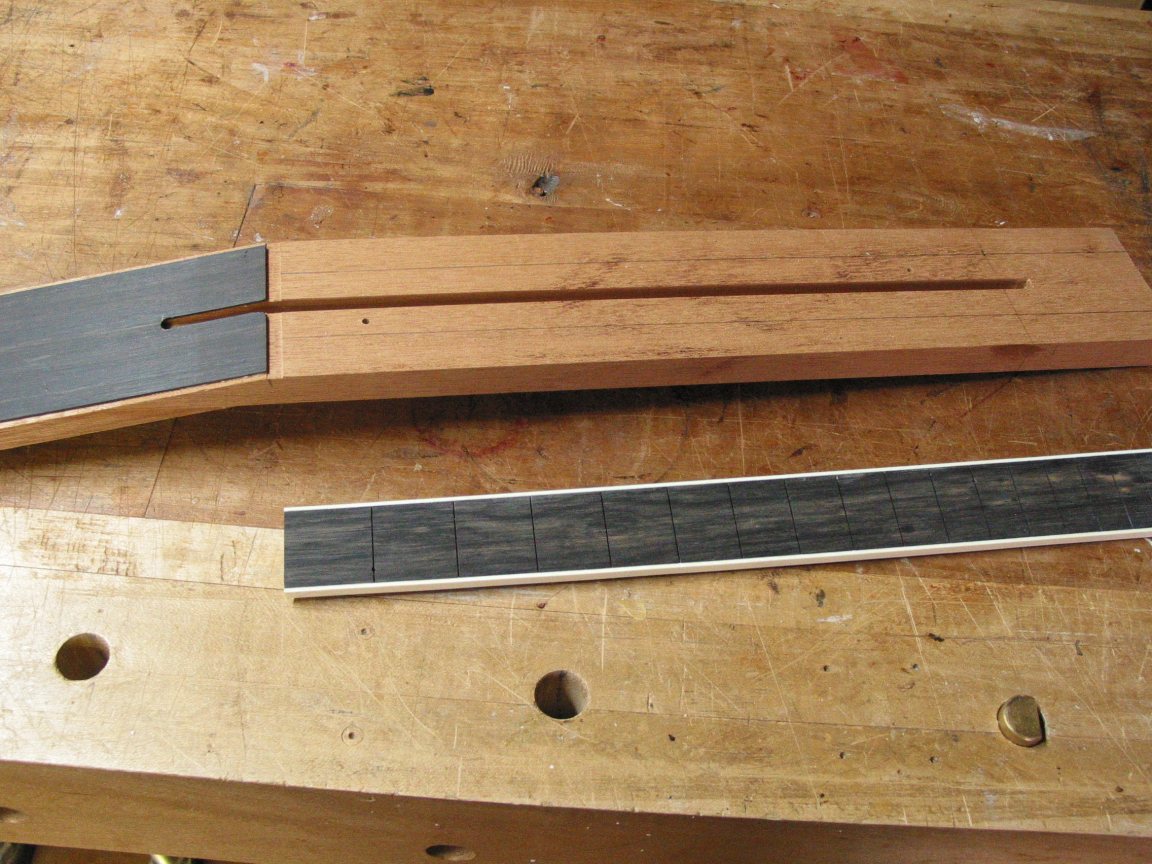
Mahogany neck blank has the truss rod slot and is ready to be cut to shape.
The neck has been cut to size and the fingerboard is made.

The peghead is cut to shape and is ready for the binding which has already been bent to shape.
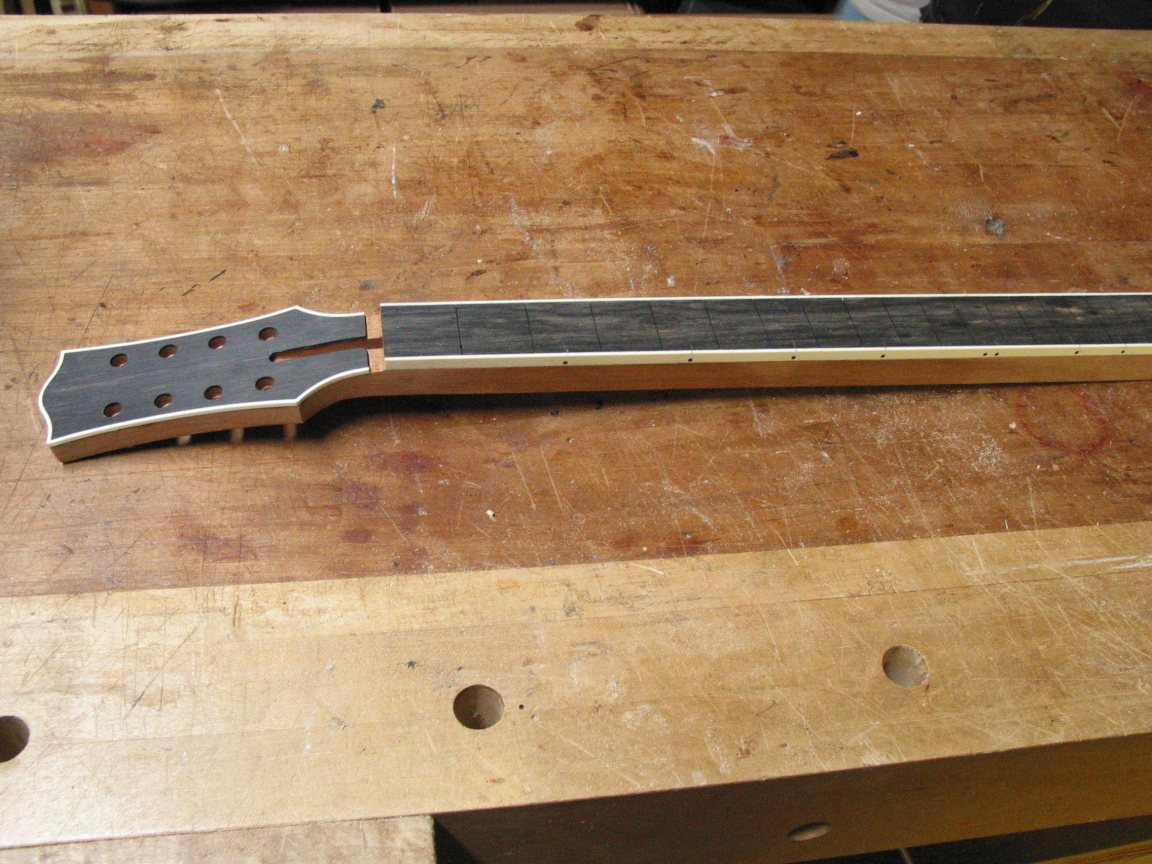
The neck and fingerboard ready for inlay.
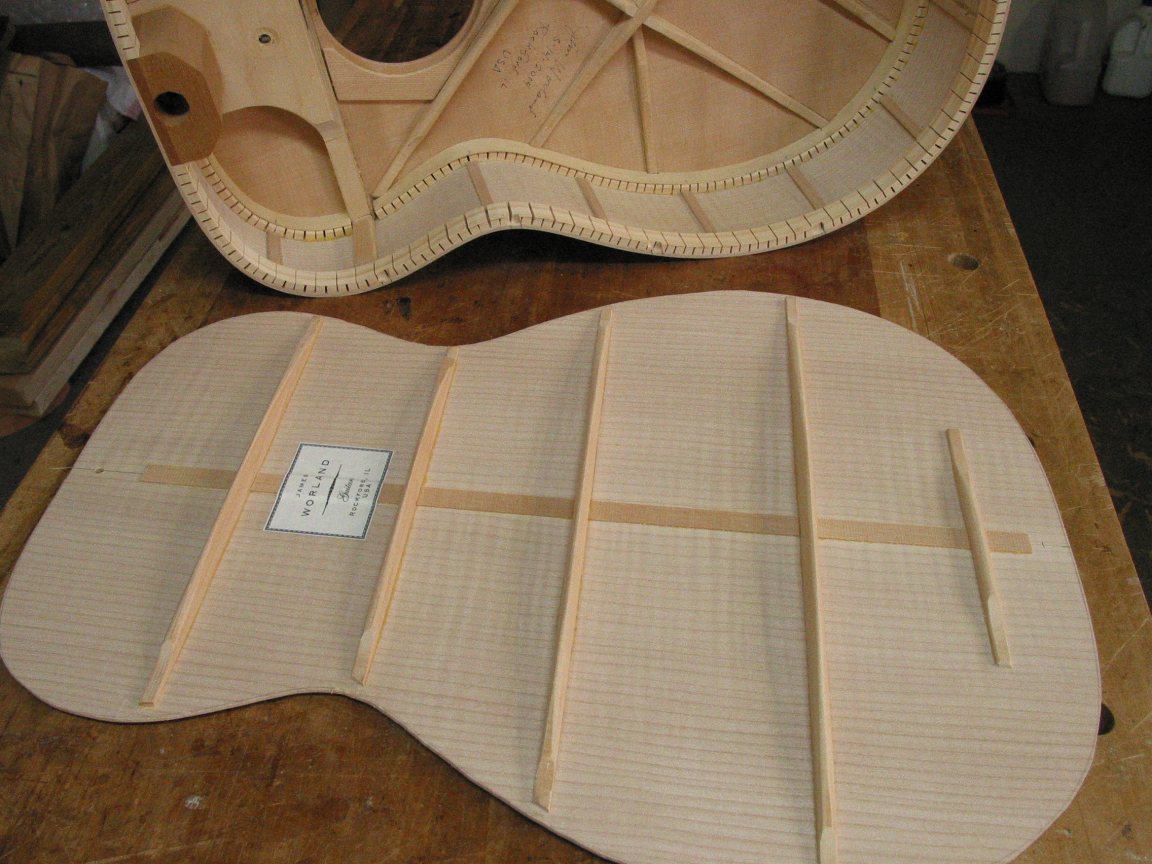
The inside bracing of the top and back.
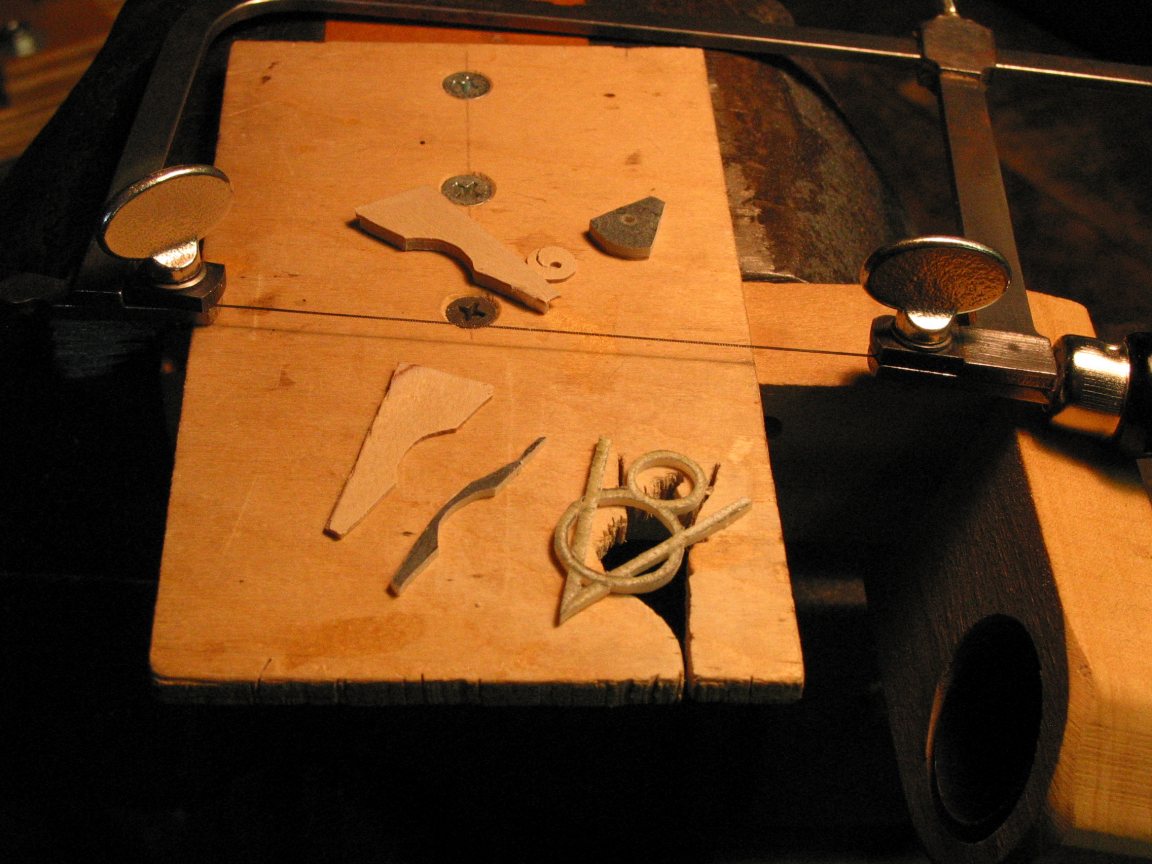
Cutting the inlay, a custom V8 symbol to represent the 8 string mandocello.
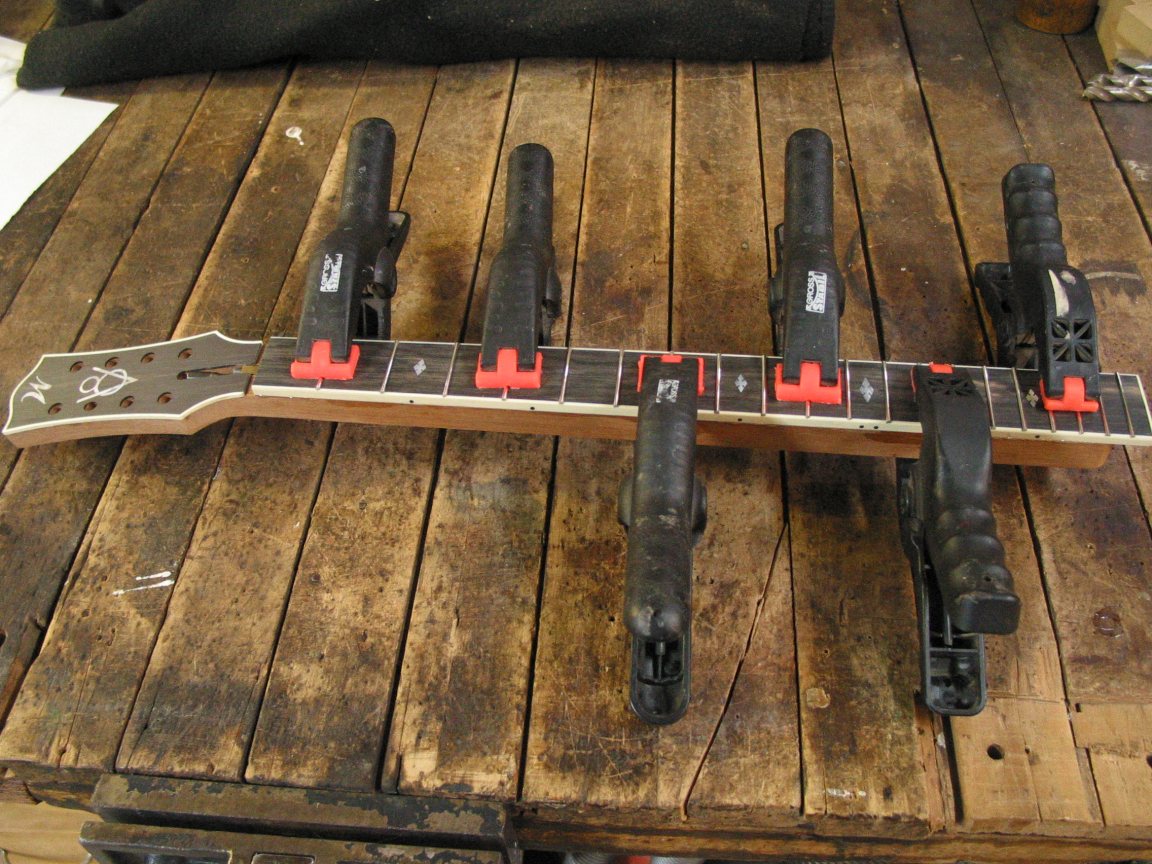
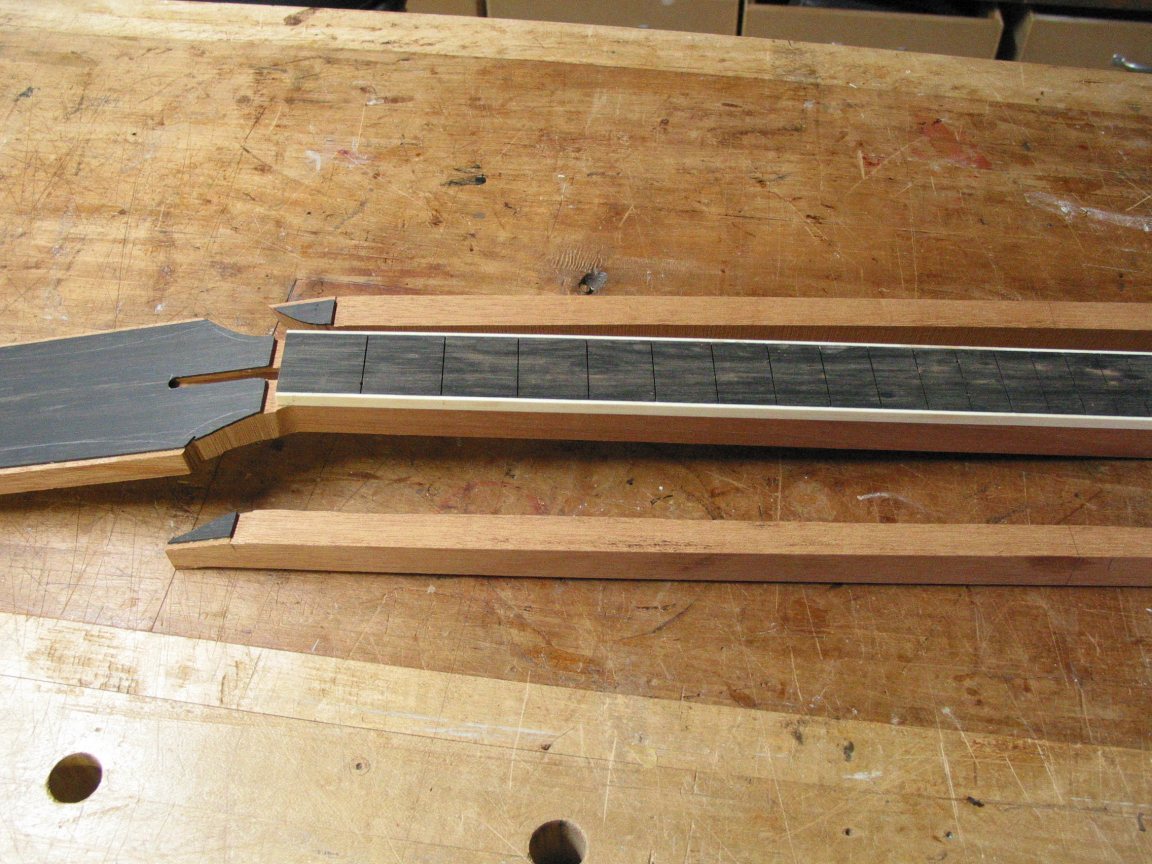
Gluing the fingerboard to the neck.
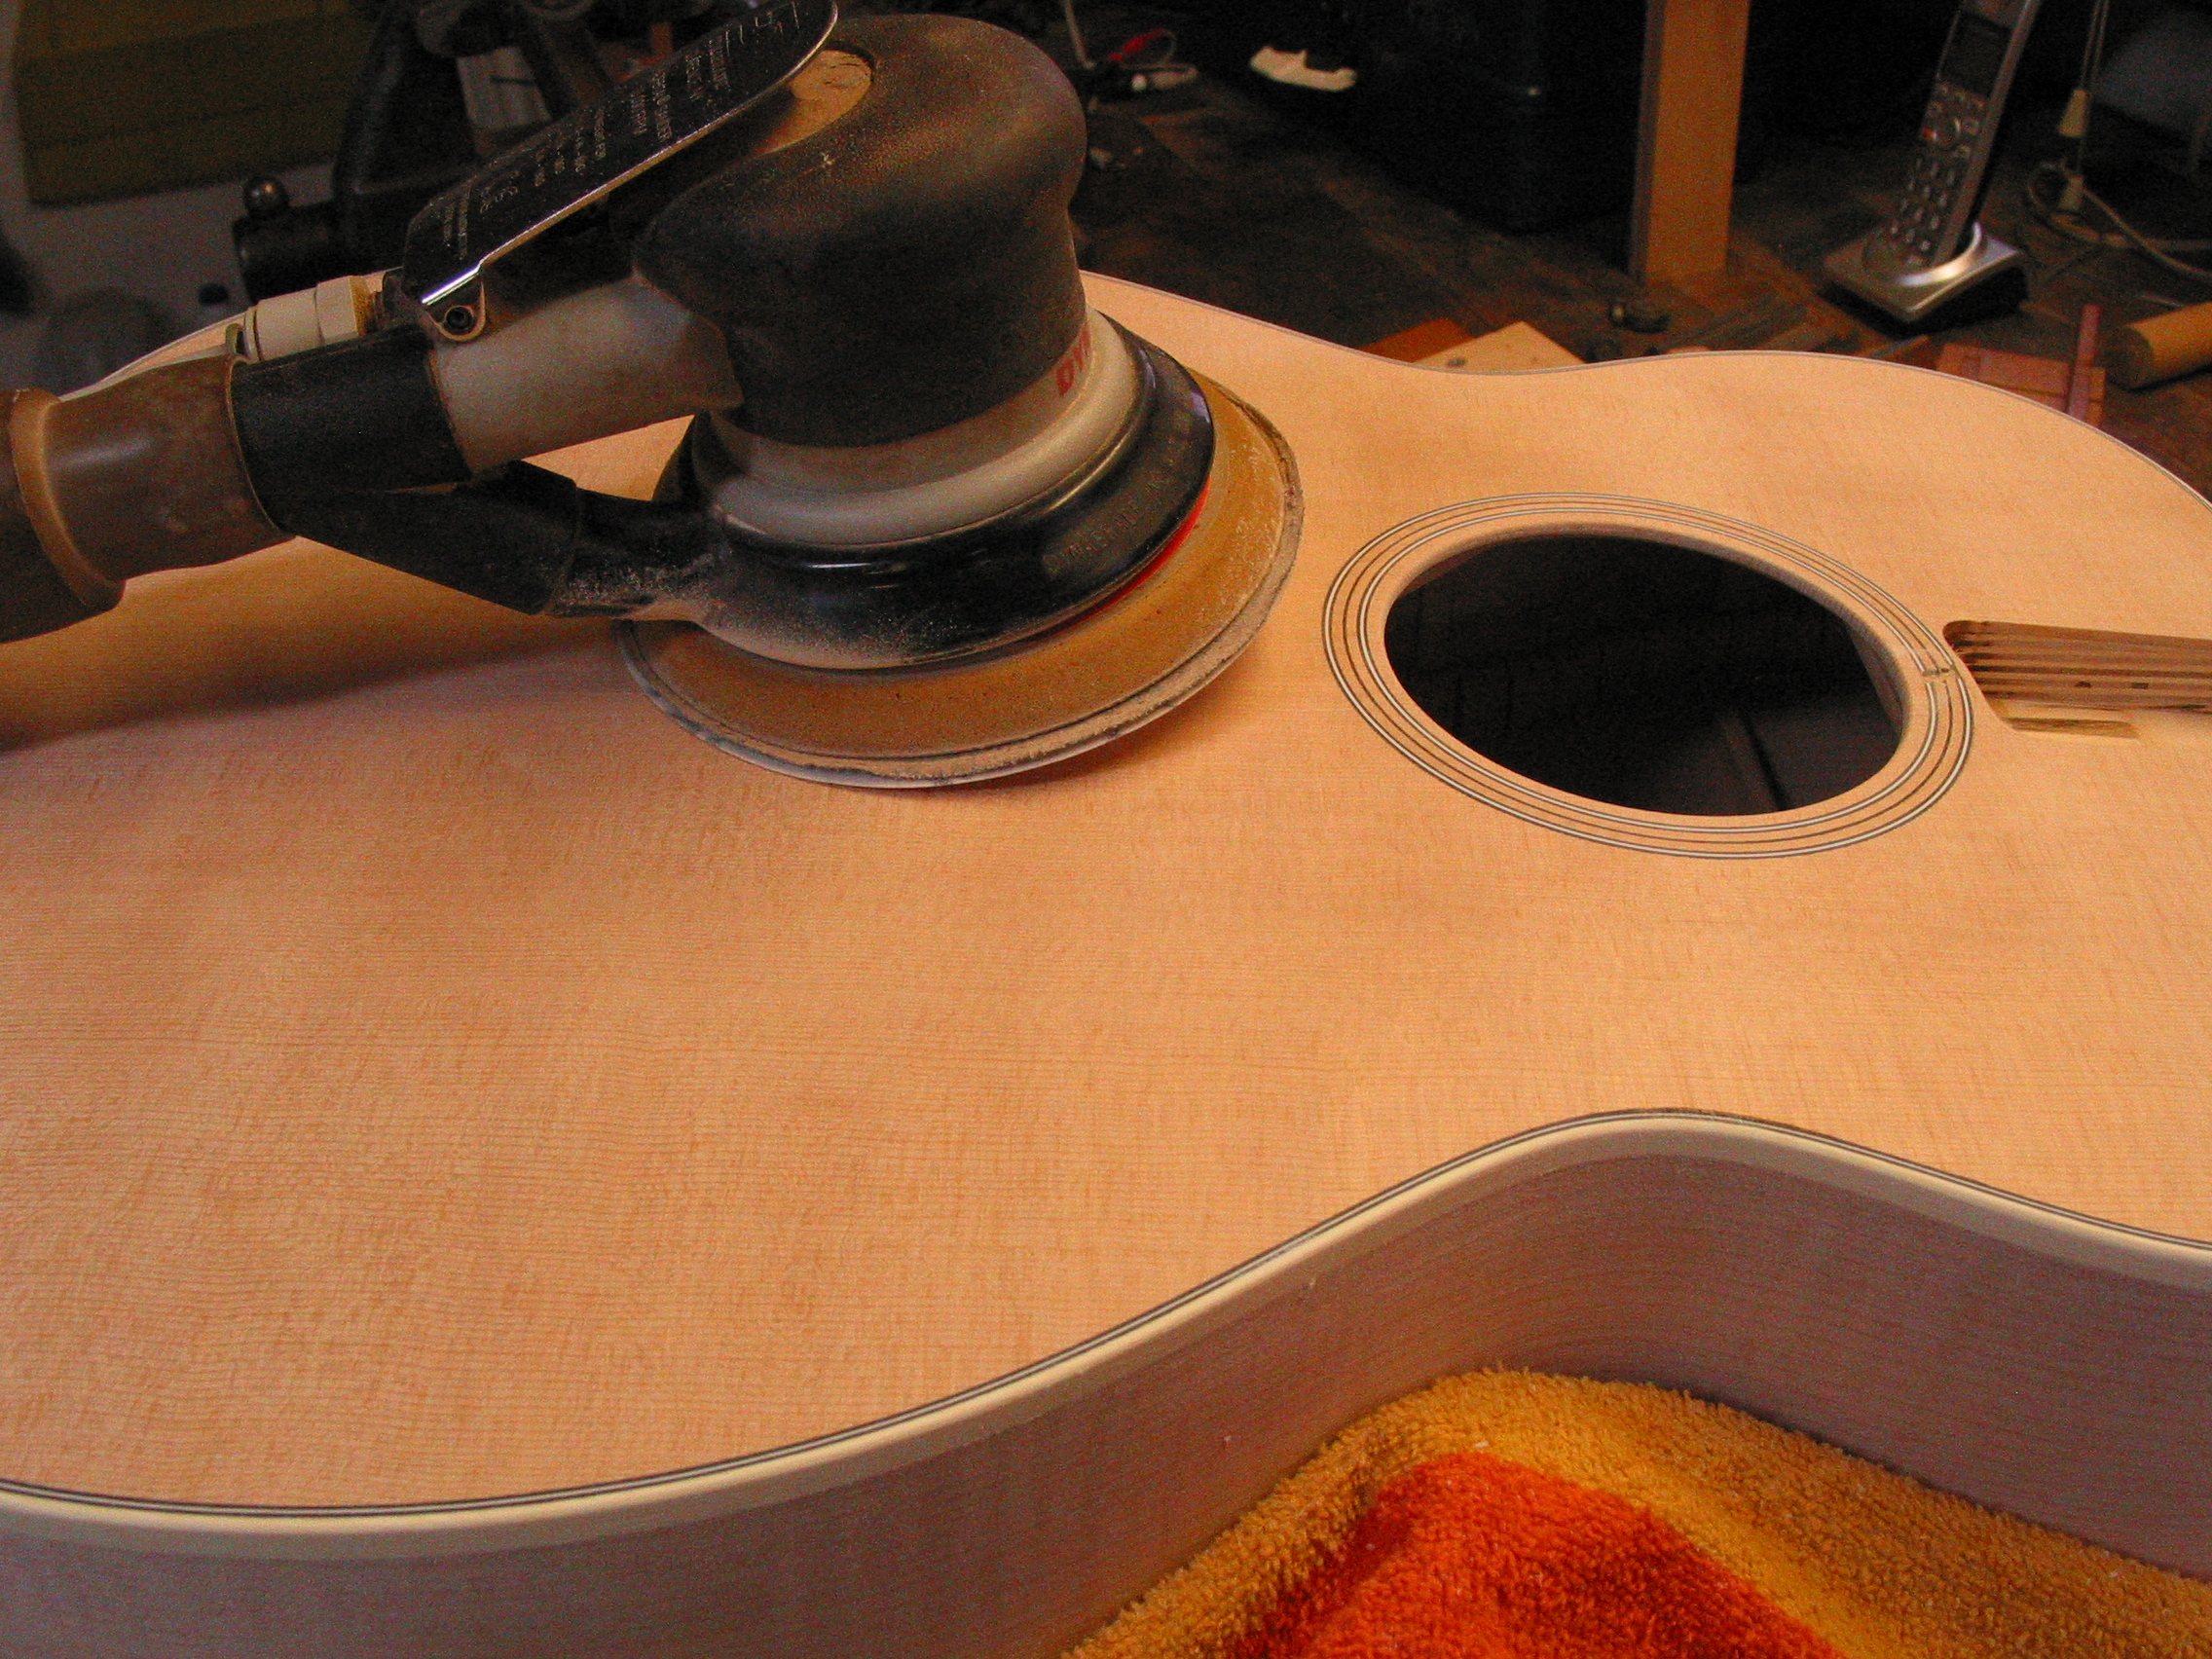
Sanding the body with my trust Dynabrade pneumatic sander.

The mandocello ready for finish.
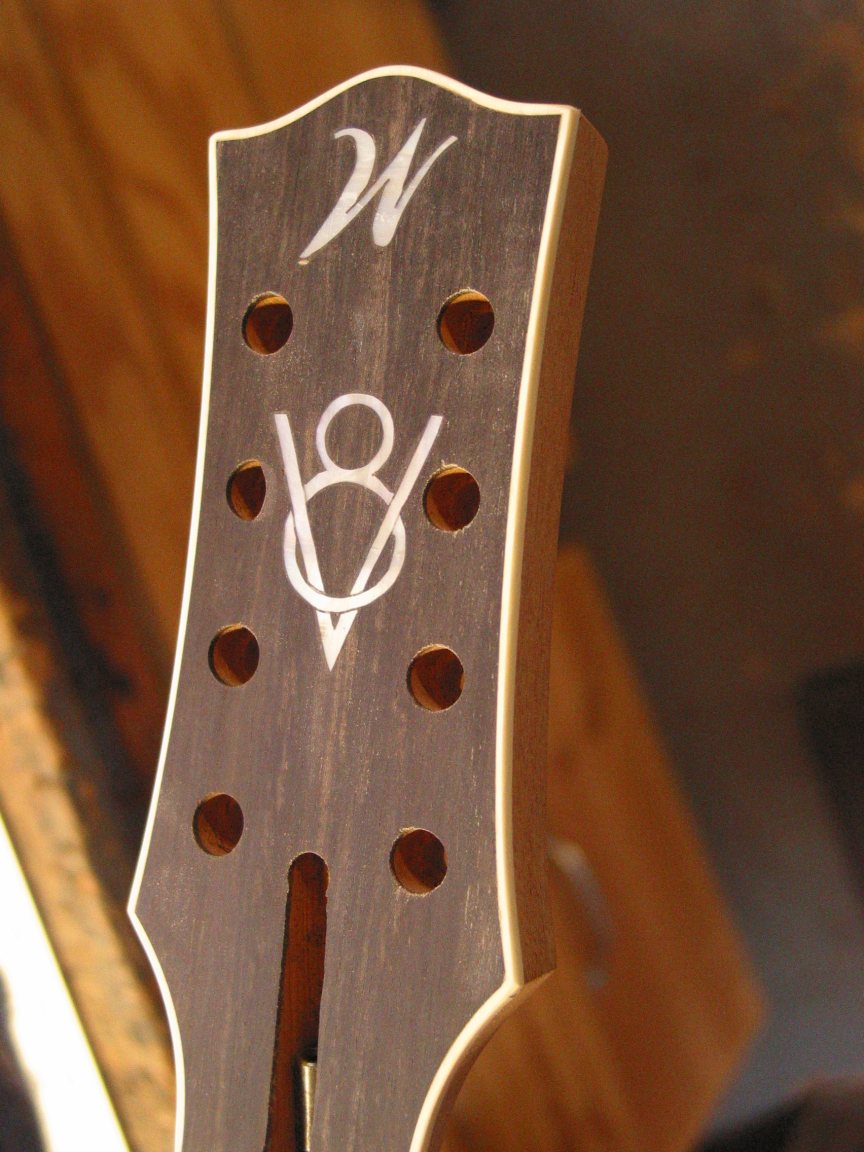
The head stock ready for finish.
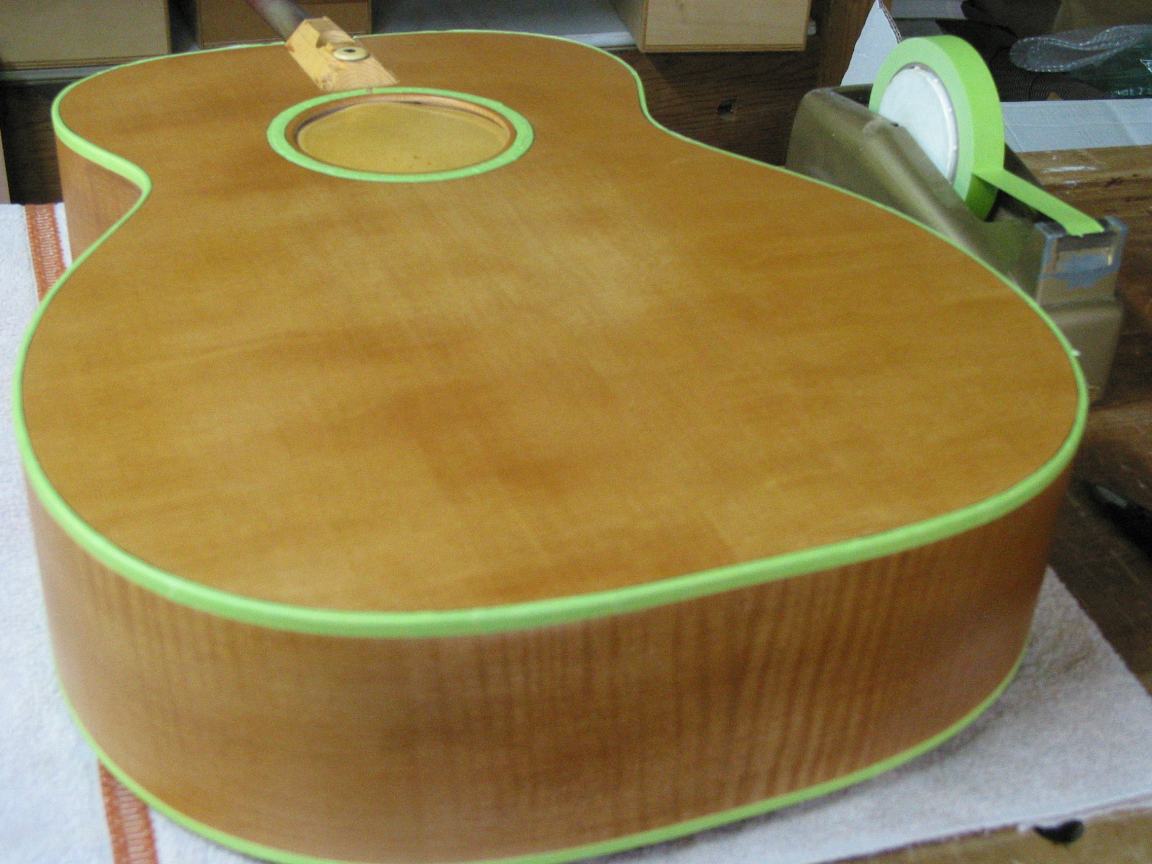
The body is ready for finish but first I have to mask off the binding and the rosette so I can spray the sunburst.
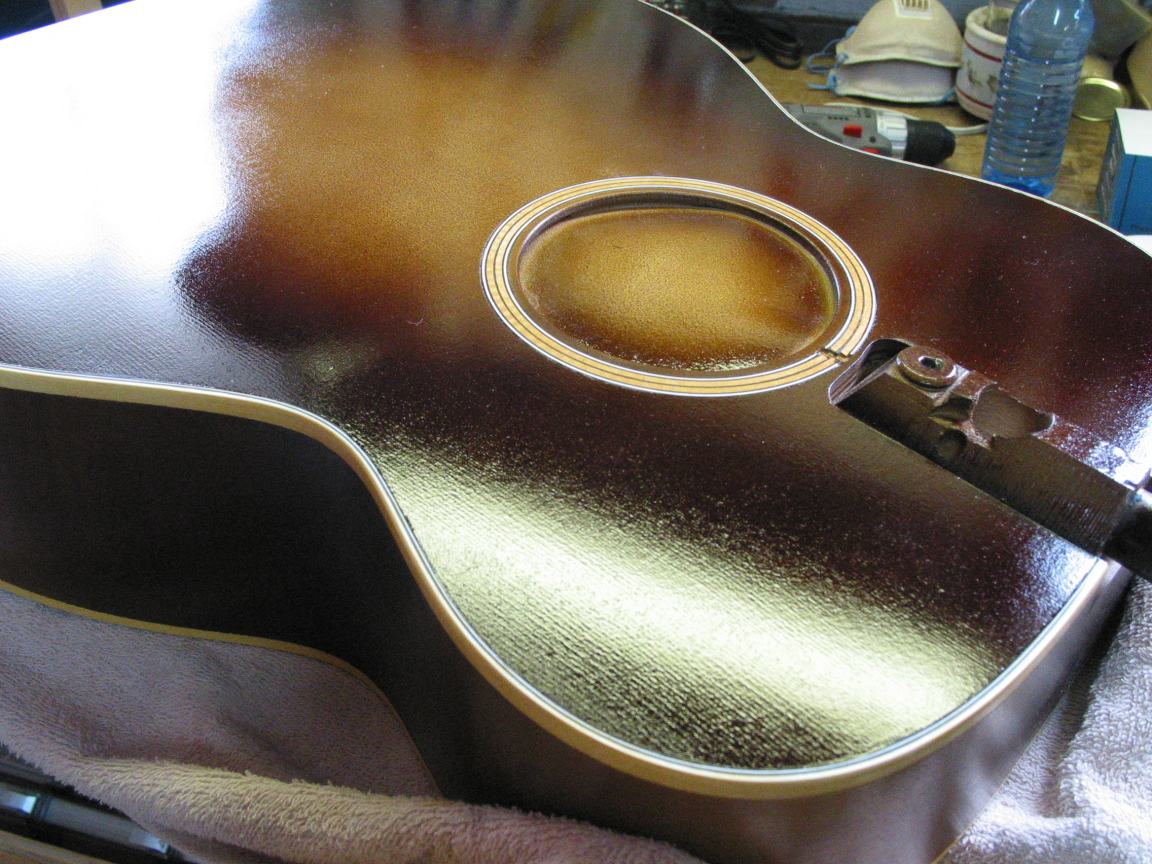
The tobacco sunburst has been sprayed on and I can take the masking off the binding.
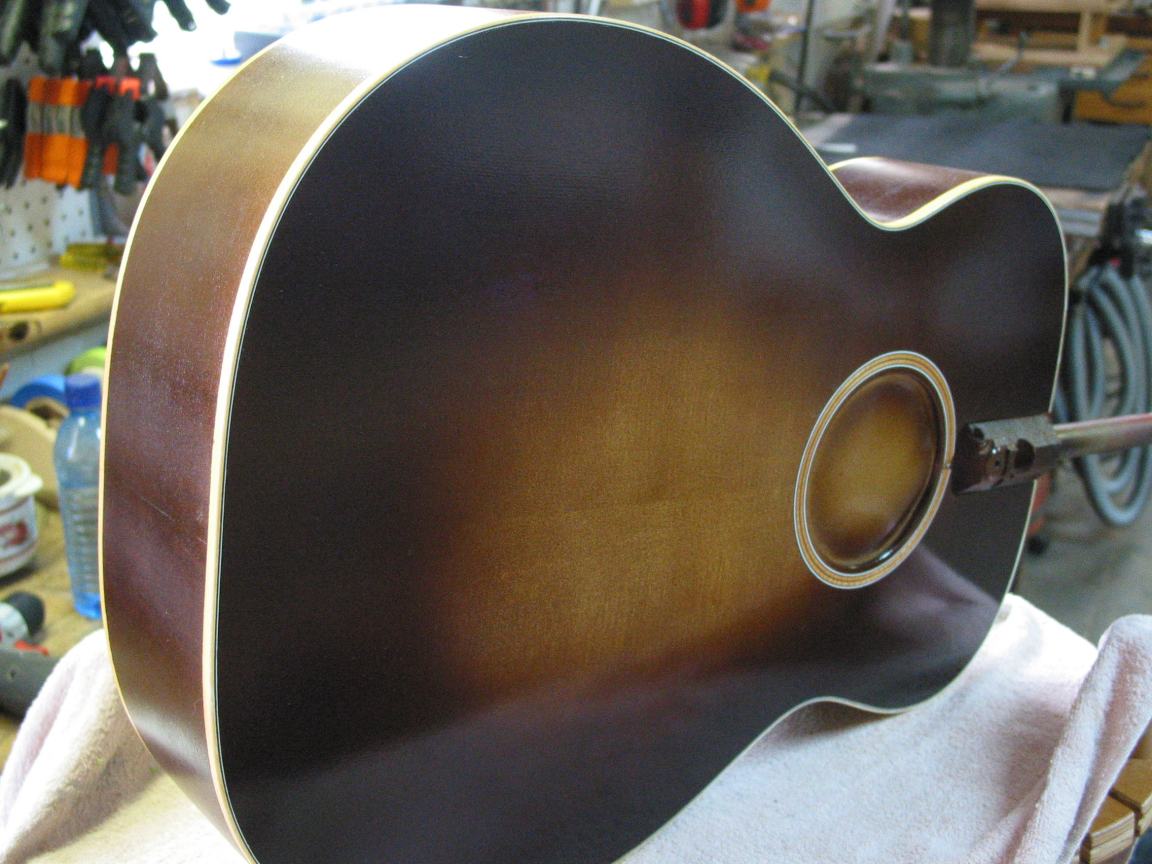
The tobacco sunburst has been sprayed on the the top, back and sides.
Any reason for the double-x bracing?